Greensboro gets adequate rain to keep yards green, but when storms stack up or a rainstorm strikes after a drought, water quickly runs off roofs, driveways, and compressed clay soils. It picks up fertilizer, oil shine, and little bits of sediment on its method to the nearest curb inlet. A well-sited rain garden disrupts that sprint. It records stormwater, holds it for a day or two, and filters it through plants and soil so more water reaches the aquifer and less reaches your crawlspace or basement. For homeowners in Greensboro and the Triad, a rain garden sets good stewardship with practical advantages, and it appears like an intentional landscape bed rather than a crafted project.
I have actually installed, rehabbed, and maintained rain gardens across Guilford County for several years. Some live behind ranch homes near Starmount, others tuck into compact lots off Walker Opportunity, and a few border larger residential or commercial properties out by Lake Brandt. The fundamentals remain consistent, but regional conditions matter. Our Piedmont clay modifications digging, sizing, and plant option. Local guidelines and watershed objectives can affect place and overflow style. And if your home ties into an HOA or a historic district, aesthetic appeals can bring as much weight as hydrology. Let's stroll through how to prepare and develop a rain garden here, with Greensboro's environment and soils in mind.
What a rain garden is, and what it is not
A rain garden is a shallow, landscaped basin that receives overflow from invulnerable areas such as roofings, driveways, and patios. The basin briefly holds water and lets it soak into changed soil within 24 to two days. It uses deep-rooted native or adapted plants to support the soil, improve seepage, and supply habitat. The water does not stand long enough to breed mosquitoes, and the garden is not a pond or wetland. In practice, a durable rain garden looks like an attractive planting bed with a small dip and an outlet for heavy storms.
The confusion typically fixates drain. Some house owners anticipate a rain garden to cure every wet spot. If your yard remains saturated since of a high water table, spring seep, or down-gradient circulation from your neighbor, an infiltration-based function might struggle. In those cases, you may require subsurface drain, soil regrading, or a hybrid setup with an underdrain that ties into a legal discharge point. A proper rain garden needs an area where water can get in quickly, expanded, soak in at an affordable rate, and bypass safely when storms go beyond capacity.
Greensboro's rains, soils, and what they indicate for design
Greensboro averages approximately 43 to 47 inches of rain per year, spread out throughout four seasons with convective summer season storms and longer winter season soakers. Many domestic rain gardens are developed around a one-inch rain event captured from contributing surfaces. That inch is not approximate. In the Piedmont, the very first inch of rainfall brings most of toxins. If you can hold and infiltrate that much from your roof or driveway, you meaningfully cut the load your property sends out downstream.
Soils are the larger lever. Much of Greensboro rests on Ultisols with a high clay portion. In older areas, decades of foot traffic, mowing, and building compaction have squeezed pore spaces. Infiltration tests often reveal rates under 0.5 inches per hour in unblemished turf. With soil change and plant establishment, I generally determine post-project rates between 0.5 and 2 inches per hour, which is enough. If you discover pockets of sandy loam, lucky you, however plan for the much heavier end of the spectrum.
Two other regional aspects matter. Slopes throughout numerous Greensboro lots run to the street, which helps gravity provide water but can make excavation trickier and need a sturdy, low-profile berm. And leaf drop from oaks, hickories, and sweetgums can plug inflow and mulch layers if you do not prepare maintenance.
Choosing an area that works with your house and lot
Walk outside during a storm and watch where water goes. If you can not see live, study how mulch shifts, where silt streaks form, and which downspouts move the most water. Tie the rain garden to a dependable source, not an unclear hope. The best places sit downslope of a roofing system downspout or the low edge of a driveway, deal 10 feet or more of separation from the structure, and prevent energy passages. In Guilford County, call 811 before you dig. Gas lines typically run near driveways and along front yards.
Distance from your house matters. I prefer 10 to 15 feet from foundation walls on crawlspace homes and a minimum of 5 feet on piece foundations with excellent boundary drainage. If your crawlspace shows historical wetness problems, increase the buffer and think about a surface area swale to bring downspout water to the garden without spilling over low areas near the house.
Sun exposure shapes plant options. Complete sun prefers flowering perennials like black-eyed Susan and blazing star. Part shade matches river oats and foamflower. Deep shade near a cluster of mature oaks can still work, but the seasonal leaf litter and root competitors make establishment slower. In the majority of Greensboro areas, you can discover a bright to gently shaded patch within a short run of a downspout.
Finally, check obstacles and HOA guidelines. Greensboro's Unified Development Ordinance typically allows residential rain gardens, but do not direct overflow onto a next-door neighbor's property or the sidewalk. If you live near a riparian buffer for a creek, follow buffer guidelines for disturbance and planting. These are uncomplicated, and regional personnel are normally handy if you call before you dig.
Sizing the basin with easy math
You can size a rain https://rowanbmcm933.raidersfanteamshop.com/rain-garden-fundamentals-for-greensboro-nc-homeowners garden with sophisticated hydrology models, but for the majority of homes, a practical method works. Start with the drainage area. A single downspout may get one-quarter of your roofing. On a 2,000 square foot roofing system, that downspout drains pipes approximately 500 square feet. Include driveway or patio area just if you can grade or channel that water toward the garden without cutting across walkways or creating hazards.
In Greensboro soils, a common design utilizes a ponding depth of 6 inches with changed soil underneath and a freeboard of an inch or more to the overflow point. If the seepage rate is around 0.5 inches per hour, a 6-inch pond will empty in roughly 12 hours, which meets the 24 to 48-hour standard. To capture the very first inch of overflow from 500 square feet, you require about 500 cubic feet of storage. Because only the void space in the mulch and soil catches water, you utilize the ponded volume above the soil surface plus the short-term storage in mulch. The fast field rule I use for Piedmont clay: make the surface area of the rain garden about 8 to 12 percent of the impervious area draining to it, at 6 inches of ponding. For 500 square feet, that offers 40 to 60 square feet. On tighter soils or where overflow control is very important, bump towards the higher end or deepen the basin to 8 inches if slopes allow.
If area is restricted, divided the load. Two little basins, each fed by a various downspout, frequently fit better in established landscaping than a single large depression. This also spreads risk: if one bay silts up, the other still performs.
Soil preparation and why it determines success
Digging in Piedmont clay teaches patience. I dig the basin to the design depth, then loosen up the subgrade with a garden fork or a small tiller to a depth of 6 to 8 inches. This roughens the bottom, which dissuades perched water from skating across a slick clay surface. Next, I include raw material. The objective is not to create a fluffy potting mix that holds water forever, but to lighten the clay enough to speed seepage while still supporting plant roots.
A mix that works for Greensboro rain gardens is roughly 50 to 60 percent existing soil, 30 to 40 percent coarse sand, and 10 to 20 percent garden compost by volume, mixed to a depth of 12 inches. If you skip sand and include only compost, the very first season can feel fantastic, then the modified layer settles and binds back into a slow-draining mass. Coarse sand opens paths that persist. Avoid really great masonry sand, which can tighten the mix. Washed concrete sand or a made bio-retention mix from a local provider performs consistently.
After mixing, rake the basin level, check the depth, and compact gently by foot to lower settling surprises. Set the inlet elevation and the outlet spillway now, before planting. A shallow rock-lined depression at the downstream edge makes a reliable overflow. Keep the top of the berm at least 3 inches above the spillway to confine big storms. Berms fail frequently because they are too sharp or too high for the soil to hold. I shape them broad and low, then seed with a stabilizer yard like annual rye over the very first season.
Getting water to the garden without making a mess
Downspouts rarely empty where you want them. I frequently cut the downspout, add a tidy aluminum elbow, and run a 4-inch strong pipeline at shallow grade throughout the lawn to a pop-up emitter set simply upslope of the rain garden. If you like the appearance, a shallow, rock-lined swale also works and includes oxygen and energy dissipation. Where the inflow meets the basin, I set a splash pad of river rock to slow the water and keep mulch from floating. In older neighborhoods with narrow side lawns, the inflow run may cross a footpath or a lawn mower route. Because case, sleeve the pipeline under a stepping stone or add a small crossing plank so household routines do not squash your inlet.
Do not let water sheet across bare soil into the basin. That welcomes disintegration and siltation, which ruins seepage rapidly. During building and construction, I keep hay wattles or a short-lived silt fence uphill and only eliminate it after the mulch and plants are in and rain has washed the stone.
Plant selection that respects Greensboro's seasons
Planting a rain garden is not a test of botanical rarity. Select species that handle both damp feet for a day and summertime dry spell. Greensboro summer seasons increase into the 90s with humidity, then September brings dry stretches. Winter season is mild, however freezes are common. Plants that manage these swings and anchor the soil win long term.
For full sun, I lean on switchgrass cultivars that remain upright, little bluestem, and muhly turf on the drier shoulders. Inside the basin, soft rush, sedges like Carex vulpinoidea, and black-eyed Susan carry the load. Coneflowers and narrowleaf sunflower include color and pollinator worth. If you desire a program in late summer season, blazing star and overload milkweed do well in amended soils with quick ponding.
In part shade, I weave river oats, golden ragwort, blue flag iris in the lower zone, and foamflower or Christmas fern up on the berm. If your website surrounds a street and you want a crisp look, usage winter-hardy evergreens like inkberry holly in little types on the perimeter and let herbaceous plants fill the interior. Avoid aggressive spreaders like common cattail; they turn a garden into a monoculture.
Native plants adjust well and support wildlife, however I utilize well-behaved cultivars when fit is right. For instance, 'Shenandoah' switchgrass holds color and stays in bounds. In any case, mix deep taprooted perennials with fibrous yards. This combination constructs a root matrix that holds soil through storms and opens channels for water. Anticipate a first-year sleep, second-year creep, third-year leap pattern. The garden looks best from year two onward.
If deer routinely wander your block, choice types they disregard. Mountain mint, spicebush on the edges, and the majority of sedges get a pass from deer. In town, rabbits often chew brand-new black-eyed Susan; a little bit of short-term fencing assists up until plants bulk up.
Mulch and cover that remain put
The right mulch slows evaporation, suppresses weeds, and secures the soil throughout early storms. In a rain garden, mulch option likewise affects efficiency. Shredded hardwood moves less than pine straw or bark nuggets. A 2 to 3-inch layer is plenty. Too much mulch floats and clogs the inlet. I keep a 6 to 12-inch stone apron where water goes into, then run shredded mulch throughout the rest of the basin and up the berms. In shady gardens where moss naturally sneaks in, I let it. A living green skin holds fine sediment better than any wood mulch.
Over the very first year, complement thin areas one or two times. After year two, as plants knit the soil, you can cut back to find mulching. If you see a crust forming from sediment, rake lightly after storms to break it up and bring back infiltration.
A practical develop sequence for a Greensboro yard
Here is a clean, field-tested order that keeps the mess down and the grade real:
- Mark energies, sketch the drainage course, and flag the garden footprint. Set laser or string levels to mark basin bottom, berm crest, and spillway. Excavate the basin and stockpile soil where the berm will sit. Roughen the bottom. Mix in sand and garden compost to develop the planting layer. Shape the berm broad and low. Install inlet piping or swale and set the rock splash pad. Set the rock-lined spillway at the developed elevation. Support berms with seed or coir mat if slopes are steep. Plant from center out, positioning wet-tolerant species low and drought-tolerant ones high. Water plants in completely to settle soil. Mulch with shredded hardwood, leaving stems clear. Test inflow with a pipe, enjoy how water spreads, and adjust stone and grade while the soil is still workable. Clean up silt controls just after the first few storms.
Maintenance through the seasons
A rain garden is not maintenance-free, however it is not a problem either. The rhythm settles into a couple of minutes after big storms and an hour or 2 in spring and fall. After installation, examine the inlet and spillway. Leaves and seed pods from sweetgum and willow oak can clog the stone apron. A quick hand sweep keeps water moving. If you see mulch rafting away, cut the inflow speed with a larger rock pad or a small check stone row simply upstream.
Weed pressure is greatest in the very first season. Pre-empt it by planting densely and watering after droughts so desired plants complete. Prevent pre-emergent herbicides in the basin. They can impede seed-grown perennials. Hand pull intruders while the soil perspires. By year 2, shade from the plant canopy decreases weed germination.
Each late winter, cut down dead stems and leave some standing bristle for overwintering bugs if you like a looser habitat appearance. If you prefer tidy, get rid of more, however keep a few clumps of hollow stems at 8 to 12 inches as shelter. Renew mulch lightly where soil shows.
Every number of years, test the basin after a half-inch rain. If water stands longer than two days, examine for sediment crust, thatch accumulation, or burrowing from animals. Loosen the surface with a fork, add a thin layer of garden compost, and reseed any bare spots. In clay-heavy yards, a mild refresh like this keeps seepage healthy.
Troubleshooting typical Greensboro issues
The most regular call I get has to do with standing water after a heavy winter rain. In January and February, soils currently hold moisture, and evapotranspiration drops. A basin that drains pipes in 10 hours in June might take 24 to 36 hours in winter season. That is appropriate as long as water is decreasing day by day. If it sticks around beyond two days, try to find a stopped up inlet, sediment bar at the surface area, or a compressed zone. Core aerate the basin area with a manual aerator, topdress with garden compost, and re-mulch. If that stops working, the subsoil may be a near-impervious layer. Adding an underdrain is the last resort. A 4-inch perforated pipeline set near the base of the changed layer and tied to a legal discharge point can bring back function without changing the garden's look.
Another issue is erosion on the downstream side of the spillway during gully-washer storms. Often, the spillway is too narrow or set too high, so water jumps the berm elsewhere. Lower and expand the spill point, include larger angular stone, and armor a brief run listed below with more rock or deep-rooted yard. Keep the spillway crest a minimum of an inch listed below the surrounding berm to direct overflow where you want it.
Mosquito issues surface every summertime. Healthy rain gardens do not breed mosquitoes because water drains before eggs hatch. If you notice problem levels, look for saucers, toys, or concealed anxieties around the garden that hold water longer than the basin. Birdbaths and pot bases are normal perpetrators. You can likewise present mosquito dunks moderately if you have a short standing spot, though that must not be necessary.
Finally, plant flop occurs in late summer season, specifically with high perennials like rudbeckias in abundant soil. Cut them back lightly in summer to motivate branching, or stake discreetly during year one. By year three, denser plantings decrease flop.
Tying a rain garden into your broader landscape
A rain garden does more than handle water. It can anchor a yard seating nook, screen a view, or connect a side lawn to the front walk. In communities where landscaping is a point of pride, treat the rain garden like any other curated bed. Repeat key plants somewhere else, echo a color palette, and edge with brick or steel where you choose a tidy line. In a more natural yard, let the rain garden ease into a native meadow spot with little bluestem and goldenrod.
For house owners browsing "landscaping Greensboro NC" to discover trustworthy aid, ask professionals about their experience with stormwater functions. Not every landscaping attire has actually built rain gardens in clay-heavy backyards. An excellent team will talk seepage rates, soil blends, and overflow information as readily as plant lists. They must also show tasks that have been through a minimum of 2 winter seasons and summertimes. New builds constantly look good on day one. The genuine test is a year later.
Costs and worth, straight
For a do-it-yourself develop on a small garden, materials run a few hundred dollars: compost and sand delivery, stone for inlet and spillway, edging, mulch, plants, and incidentals. Leasing a little tiller or utilizing hand tools keeps costs in check, though you will spend a weekend digging. Expertly installed rain gardens in Greensboro generally vary from the low thousands for a compact unit to numerous thousand for bigger, piped-in basins with substantial planting. Expenses increase with gain access to difficulties, transporting distance, and sophisticated stonework.
The value can be found in less water pooling near the house, less lawn washouts, richer plant life, and a concrete cut in runoff. On residential or commercial properties with chronic dampness around foundation corners, minimizing concentrated downspout discharge toward the house deserves more than the amount of its parts. I have seen crawlspace humidity drop by quantifiable points after we routed roof water to a pair of rain gardens and a supported swale.
When the website says no, and what to do instead
Some lots do not fit the rain garden design. If your soil percolation test is under 0.25 inches per hour even after change, the basin will struggle. If you have just a narrow side yard with a high slope and utilities all over, excavation may not be safe or effective. In those cases, consider alternative green infrastructure. Rain barrels or tanks that feed a drip line, permeable paver strips along the driveway shoulder, or a shallow roadside swale with check dams can together achieve similar runoff reductions. I typically match a modest rain garden with a 65 to 100-gallon rain barrel system. The barrel takes the first splash, then the overflow feeds the garden gently, decreasing disintegration and stretching supply of water for summer season irrigation.
Local resources and learning from your neighbors
Greensboro and Guilford County have a deep bench of gardeners and civic groups who appreciate water. Neighborhood associations near Bog Garden and Country Park have actually set up presentation rain gardens you can walk by and research study. The local extension office provides seasonal workshops on native plants and soil health. Seeing a rain garden through the year teaches more than any diagram. Notice how plants pass away back, how mulch settles, and how edges hold after storms. Talk to the property owners if they are out. Most more than happy to share what went right and what they would do differently.
When you are ready to construct, assemble your products before digging. See the projection and aim for a dry window, then prepare for a very first great rain a week or 2 after planting. That early test exposes whether water spreads across the basin or finds a fast lane. A little modification while the soil is pliable avoids headaches later.
The peaceful payoff
A rain garden feels like a small gesture, however it moves how your backyard acts in a storm. Instead of rushing water off the property, you hold it quickly and put it to work. Plants root much deeper, soil loosens up, birds and bees discover a pocket of environment, and your yard stops losing thin pieces of itself to every downpour. This is landscaping with intent, a practical, attractive way to make a Greensboro yard resilient.
If you already invest in landscaping, adding a rain garden lines up form with function. It turns a damp corner or a wasteful downspout into a function. Start with honest website observation, respect the clay, move water with purpose, and pick plants that can ride out our summer seasons. Done right, your rain garden will fade into the background on reasonable days and silently do its finest work when the thunderheads roll in.

Business Name: Ramirez Landscaping & Lighting LLC
Address: Greensboro, NC
Phone: (336) 900-2727
Email: [email protected]
Hours:
Sunday: Closed
Monday: 8:00 AM–5:00 PM
Tuesday: 8:00 AM–5:00 PM
Wednesday: 8:00 AM–5:00 PM
Thursday: 8:00 AM–5:00 PM
Friday: 8:00 AM–5:00 PM
Saturday: 8:00 AM–5:00 PM
Google Maps: https://www.google.com/maps/search/?api=1&query=Google&query_place_id=ChIJ1weFau0bU4gRWAp8MF_OMCQ
Map Embed (iframe):
Social Profiles:
Facebook
Instagram
Major Listings:
Localo Profile
BBB
Angi
HomeAdvisor
BuildZoom
Ramirez Landscaping & Lighting is a Greensboro, North Carolina landscaping company providing design, installation, and ongoing property care for homes and businesses across the Triad.
Ramirez Landscaping & Lighting offers hardscapes like patios, walkways, retaining walls, and outdoor kitchens to create usable outdoor living space in Greensboro NC and nearby communities.
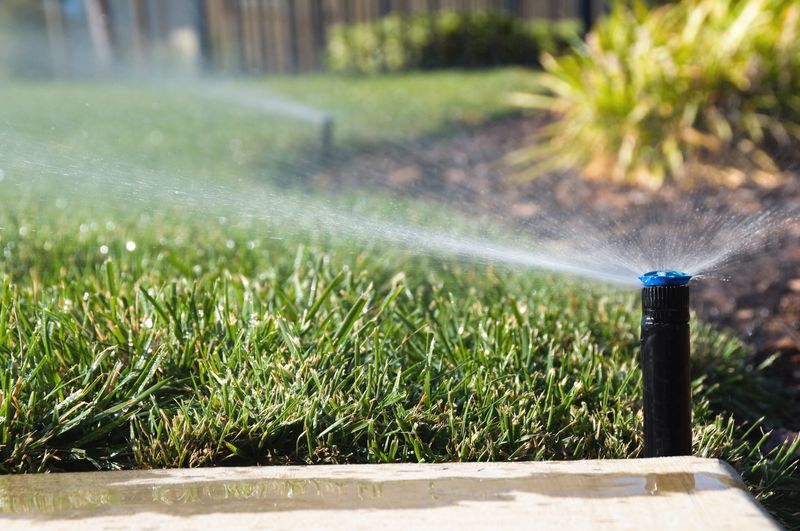
Ramirez Landscaping & Lighting provides irrigation services including sprinkler installation, repairs, and maintenance to support healthier landscapes and improved water efficiency.
Ramirez Landscaping & Lighting specializes in landscape lighting installation and design to improve curb appeal, safety, and nighttime visibility around your property.
Ramirez Landscaping & Lighting serves Greensboro, Oak Ridge, High Point, Brown Summit, Winston Salem, Stokesdale, Summerfield, Jamestown, and Burlington for landscaping projects of many sizes.
Ramirez Landscaping & Lighting can be reached at (336) 900-2727 for estimates and scheduling, and additional details are available via Google Maps.
Ramirez Landscaping & Lighting supports clients with seasonal services like yard cleanups, mulch, sod installation, lawn care, drainage solutions, and artificial turf to keep landscapes looking their best year-round.
Ramirez Landscaping & Lighting is based at 2700 Wildwood Dr, Greensboro, NC 27407-3648 and can be contacted at [email protected] for quotes and questions.
Popular Questions About Ramirez Landscaping & Lighting
What services does Ramirez Landscaping & Lighting provide in Greensboro?
Ramirez Landscaping & Lighting provides landscaping design, installation, and maintenance, plus hardscapes, irrigation services, and landscape lighting for residential and commercial properties in the Greensboro area.
Do you offer free estimates for landscaping projects?
Ramirez Landscaping & Lighting notes that free, no-obligation estimates are available, typically starting with an on-site visit to understand goals, measurements, and scope.
Which Triad areas do you serve besides Greensboro?
Ramirez Landscaping & Lighting serves Greensboro and surrounding Triad communities such as Oak Ridge, High Point, Brown Summit, Winston Salem, Stokesdale, Summerfield, Jamestown, and Burlington.
Can you help with drainage and grading problems in local clay soil?
Yes. Ramirez Landscaping & Lighting highlights solutions that may address common Greensboro-area issues like drainage, compacted soil, and erosion, often pairing grading with landscape and hardscape planning.
Do you install patios, walkways, retaining walls, and other hardscapes?
Ramirez Landscaping & Lighting offers hardscape services that commonly include patios, walkways, retaining walls, steps, and other outdoor living features based on the property’s layout and goals.
Do you handle irrigation installation and repairs?
Ramirez Landscaping & Lighting offers irrigation services that may include sprinkler or drip systems, repairs, and maintenance to help keep landscapes healthier and reduce waste.
What are your business hours?
Ramirez Landscaping & Lighting lists hours as Monday through Saturday from 8:00 AM to 5:00 PM, and closed on Sunday. For holiday or weather-related changes, it’s best to call first.
How do I contact Ramirez Landscaping & Lighting for a quote?
Call (336) 900-2727 or email [email protected]. Website: https://www.ramirezlandl.com/.
Social: Facebook and Instagram.
Ramirez Landscaping & Lighting is proud to serve the Greensboro, NC area with quality irrigation installation solutions to enhance your property.
Need outdoor services in Greensboro, NC, reach out to Ramirez Landscaping & Lighting near Greensboro Coliseum Complex.